
How to install Top Fix Curtains
Before starting, make sure you have all the correct parts for installing curtains:
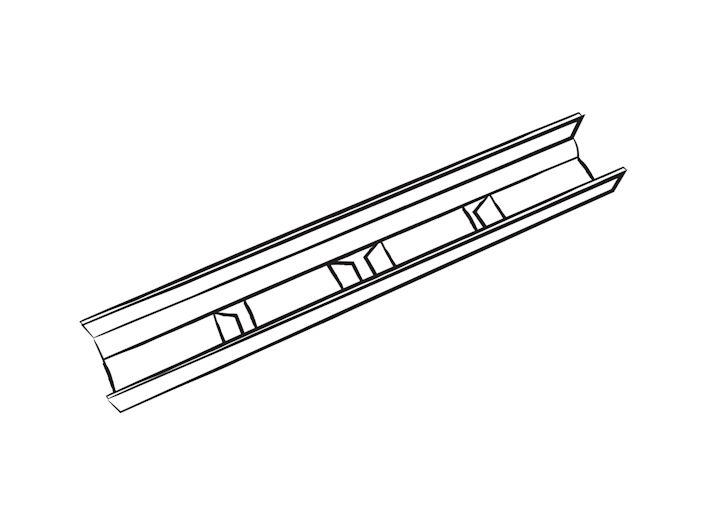
- Track
- Curtains
- Mounting brackets (Either Top Fix or Face Fix Brackets)
- Curtain wands
- Screws
- Track Joiner (only if your track was over 2.3m)
And some other things you'll need:
- A FRIEND! DIY is always easier with help
- Pencil
- Measuring Tape
- Drill
- Ladder
- Stud finder (optional)
- Toggles and toggle gun (if installing into plaster)
Step One: Connect Your Track
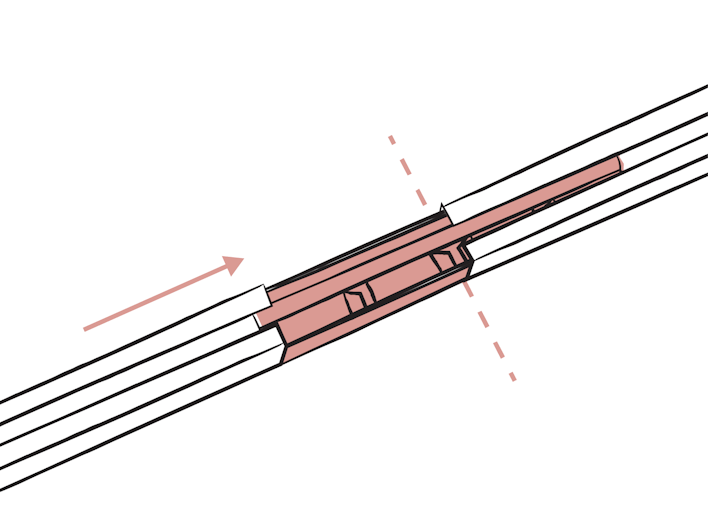
If you have a long track, you will have to connect your track using a joiner
1. Place the joiner on the ground between each side of your track, with the open side of the track facing upwards.
2. Slide one half of the joiner into one side of your track
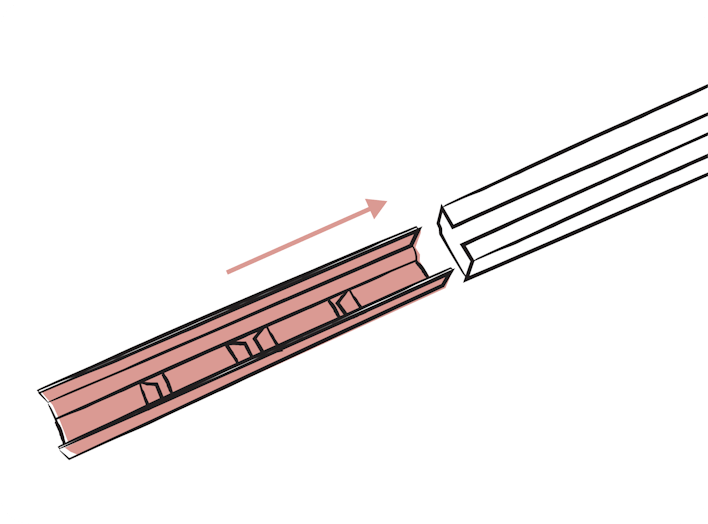
3. Slide the other half of the joiner into the other side of your track
Step Two: Attach Your Brackets
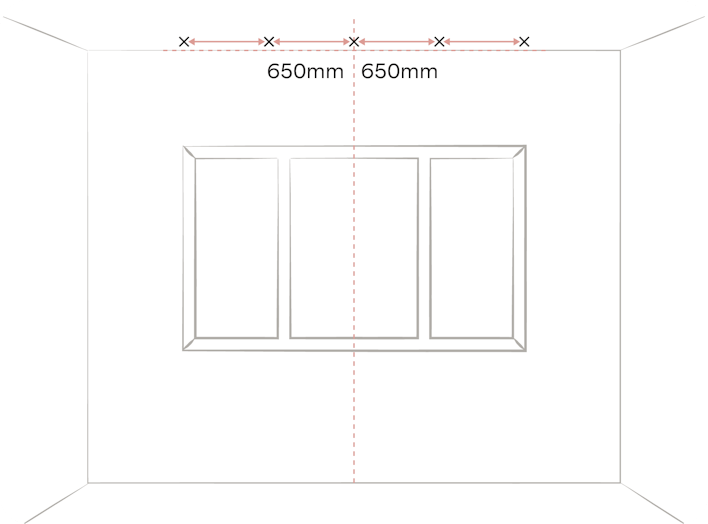
Before installing your track, you will need to measure and mark up where your brackets will go
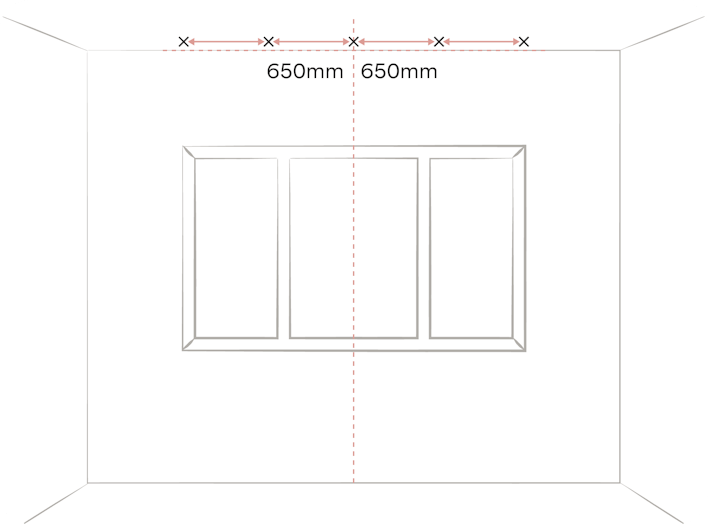
1. Using the track as a guide, position your brackets 100mm inside from each end of the track.

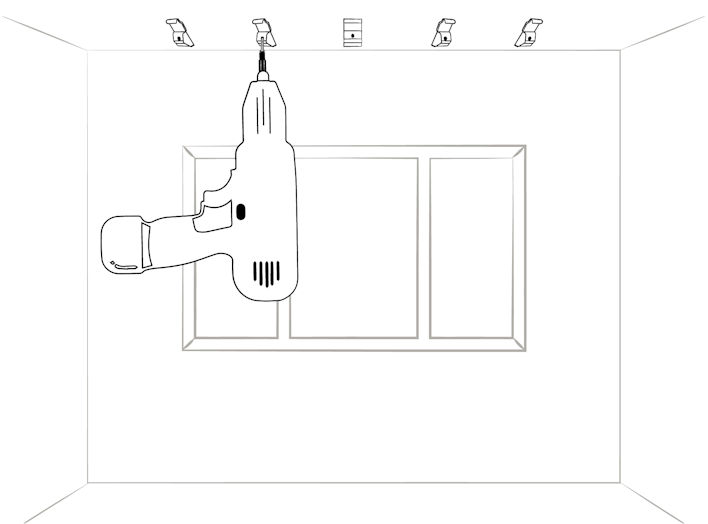
2. Place the remaining brackets evenly across the track between your outer brackets. We recommend 650mm between each bracket.
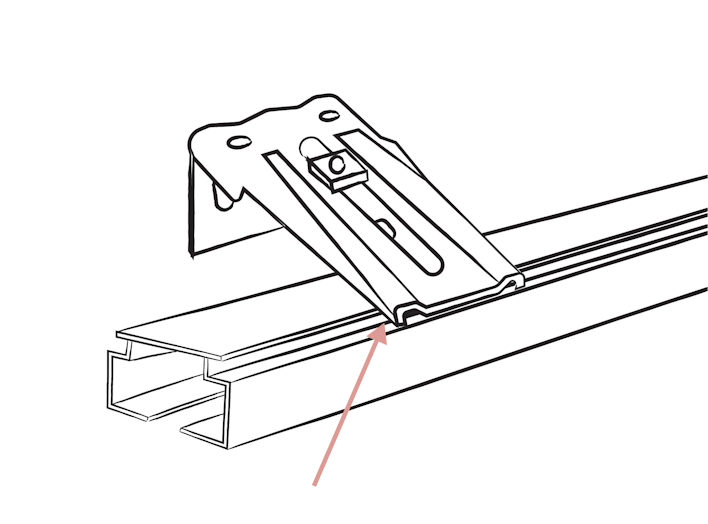
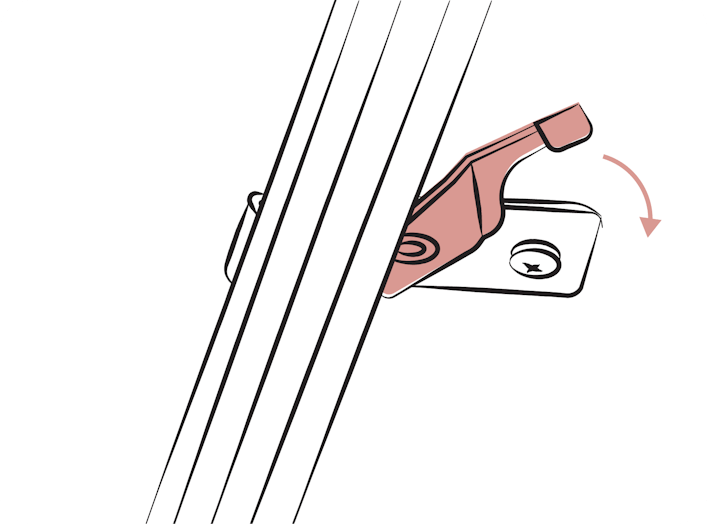
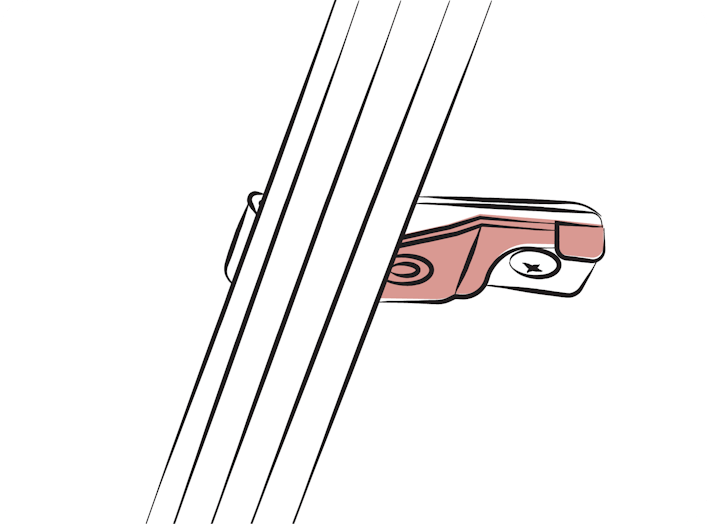
3. Connect each bracket to your track. To attach the brackets, gently clip the small claw from end of the bracket into the groove on the track. Hold it in place and use the lever at the back of the bracket to lock and tighten it onto the track.
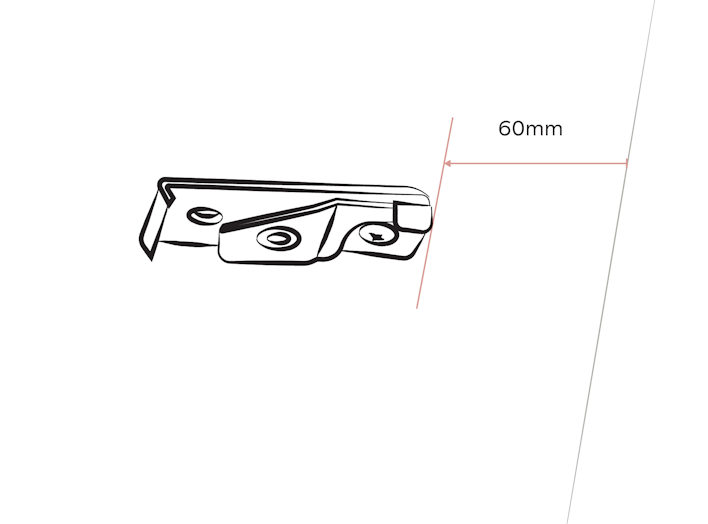
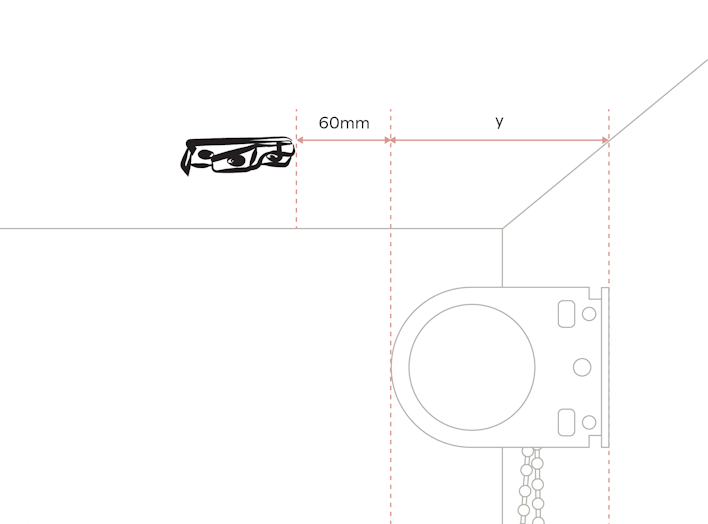
4. Place your track underneath the ceiling, start by positioning your bracket at least 60mm from the wall.
5. Mark each bracket point with a pencil
6. Remove your brackets from the track to prepare for installation!
Step Three: Managing Obstructions
Depending on your specific window type, you may need to adjust the bracket or bracket position (before installing) to avoid any obstructions so curtains can flow smoothly
An obstruction is anything that protrudes further out than the rest of your wall. Obstructions can be things like:
- Window sills
- Winders
- Roller Blinds
If you do need to clear obstructions, follow the below steps:
1. Measure your obstruction from the wall to the tip of your obstruction
2. Position your brackets an additional 60mm from the point that the obstruction protrudes
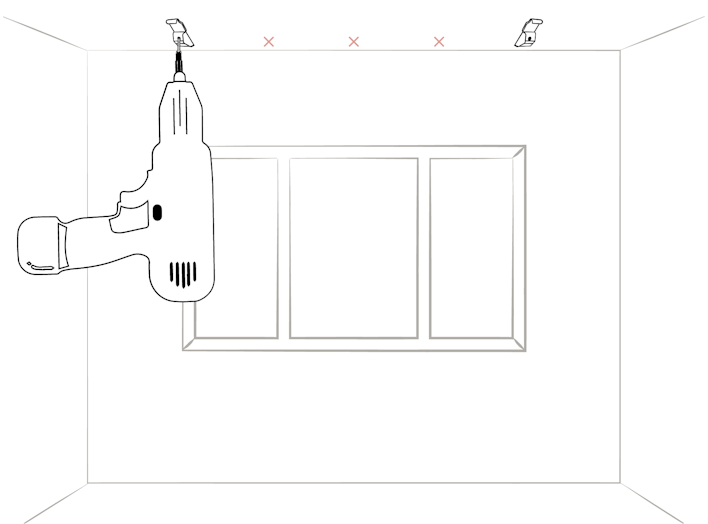
Step Four: Install Your Brackets
Starting with your outer brackets, install each of your brackets to the wall
1. If you haven't already, remove your brackets from the track
2. Using your measure points as a guide, fix your brackets to the ceiling.
Step Fix: Attach Your Tracks
Connect your track to the brackets by gently clipping the small claw from the end of the bracket into the groove on the track. Hold it in place and use the lever at the back of the bracket to lock and tighten it onto the track.
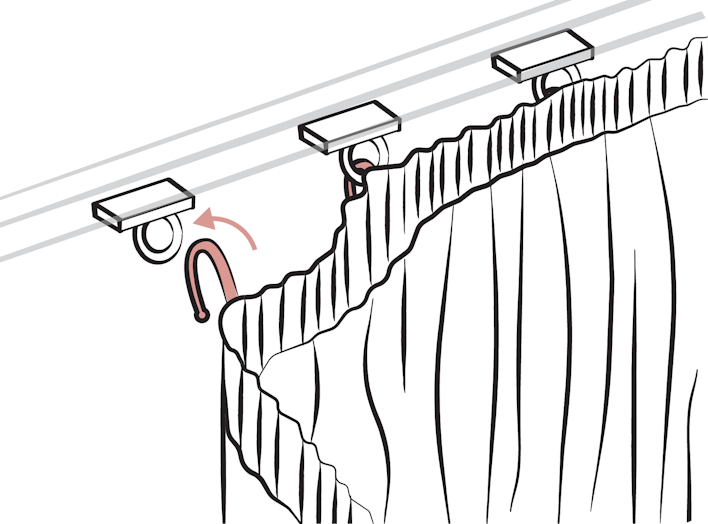
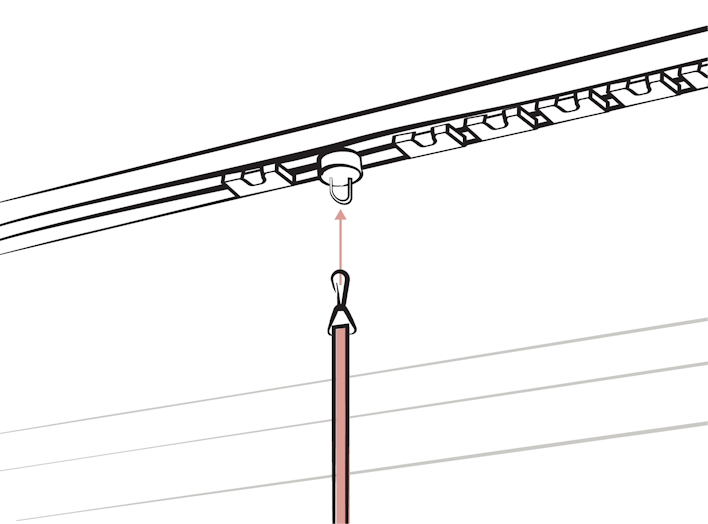
Step Six: Hang Your Curtains
First, your curtain wands will need to be placed onto the track runners. Connect the wand to the dedicated curtain runner on the track (it will look different to the other runners).
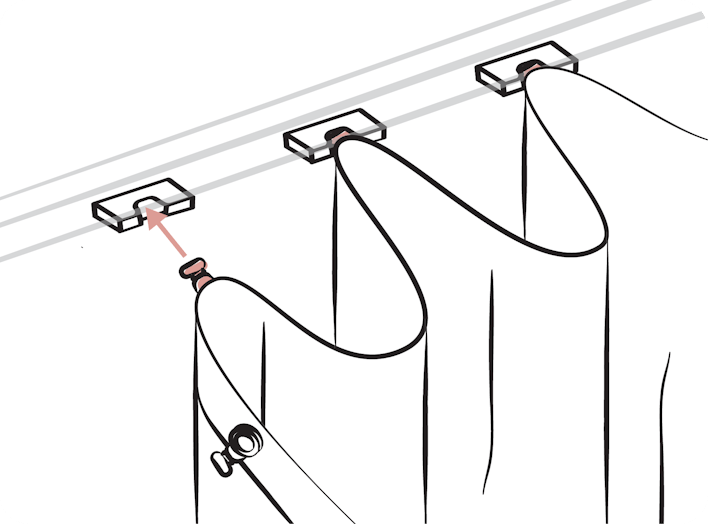
Finally the curtains are coming up!
S-Fold
Curtains will need to be attached to the track runners and your space will be transformed! Using the hooks behind your S-fold curtains, start connecting and snapping them onto the curtain runners that are inside the track. To get the perfect S fold wave in your curtains, push each fold behind the track to get a deeper rounded fold (in the shape of an S!) and continue for the whole curtain.
Pinch Pleat
For pinch pleats curtains, super easy - just hook the curtain to the runners on the track!