-
Shop
Sheer curtains are light filtering, airy, and versatile
Blockouts are ideal for sleep and privacy

Sheer curtains are light filtering, airy, and versatile
Blockouts are ideal for sleep and privacy

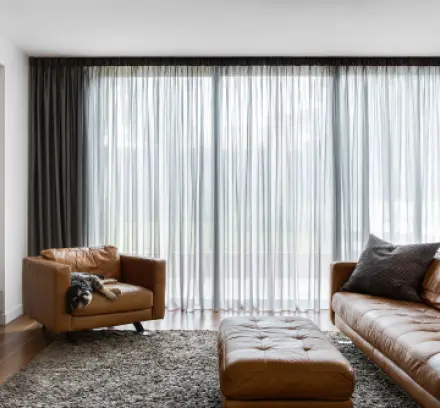
Combining block-out curtains and sheers is a great way to achieve both privacy and light control in your space. Block-out curtains are designed to keep out light and provide privacy. Sheers are light and airy, allowing natural light to filter through while still providing some degree of privacy during the day.
Block-out fabric offers 100% opacity and provides complete privacy when closed, while sheer fabric is translucent and provides some privacy, depending on the time of day. When combined into a double curtain, you get the best of both worlds!
Learn more about choosing the right fabric here.
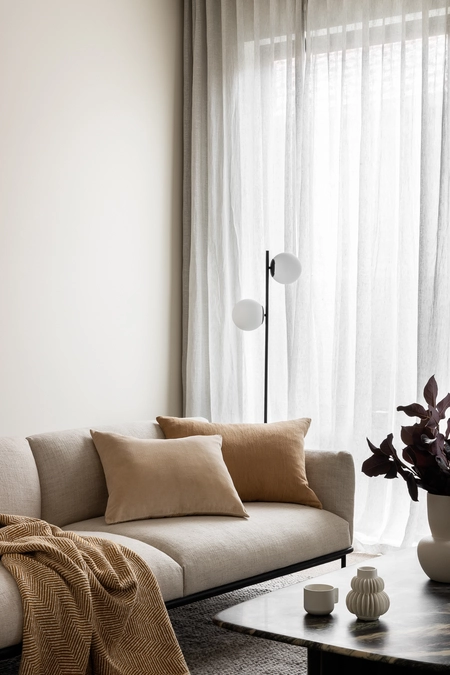
This fact makes double curtains practical for a wide variety of applications, but especially perfect for use in bedrooms and theatre rooms as the sheer provides softened light throughout the day, while the block-out provides privacy at night and minimises glare throughout the day.
Depending on the look you are going for, either fabric can be hung from either track. Having the block-out at the front (room side), with the sheer behind (window side) achieves a more traditional look, while the more modern approach is having the block-out at the back (window side) and the sheer in front (room side).
Learn more about pairing sheer and block-out fabrics together here.
There are 4 combinations of headings available from the Curtains Dept.
Although you have complete freedom of choice, our recommendation, and the most popular option, is to have the back curtain (wall side) as a pinch pleat, with the front curtain (room side) as an s-fold. This is usually the best option because you can minimise the space that your double curtain takes up, while still maintaining the aesthetic of the popular s-fold pleat at the front.
The alternatives to this combination is to have one of the following:
Advantages: you can achieve the popular aesthetic of the s-fold pleat when the curtains are open and closed.
Disadvantages: protrudes into the room the most out of the available combinations.
Advantages: protrudes into the room the least out of the available combinations.
Disadvantages: you don’t achieve the popular s-fold aesthetic.
Advantages: provides a more traditional look by featuring the pinch pleat.
Disadvantages: protrudes into the room more that a double pinch pleat combination but hides the popular s-fold pleat when the front curtain is closed.

Learn more about choosing heading styles here.
At Curtains Dept we provide double brackets for face-fix curtains, with the block-out curtains on one track and the sheers on the other. These also come with bracket covers in a matching colour to hide the base of the bracket and the screws used when installing.
If you are top-fixing double curtains (i.e. from the ceiling), then we provide two separate sets of top-fix brackets with corresponding tracks.

Learn more about the different fixing types here.
Measuring for double curtains is very similar to measuring for single curtains, with just a few variations. The most notable difference is that you will need 200mm clearance to accommodate for a double curtain for either fixing. It is also worth noting that the projection of double curtains is approximately 200mm into the room.
At the Curtains Department, we do not recommend installing face-fix curtains into plaster as the weight from the fabric can cause issues with fixing. If you would like to face fix your double curtains, you will either need to use a stud finder to ensure you are securing the brackets to a solid fixing behind your plaster, or fix to a timber architrave.
Alternatively, if practical, you can always top fix your double curtains from the ceiling. This is usually more appropriate because the weight of the curtains is spread across the two sets of brackets secured to a wider portion of plaster.
Learn more about measuring curtains here.
* We always recommend fixing into studs, where possible. *
Installing top fix double curtains is also very similar to installing a single top fix curtain. The only difference is that if you have chosen to top fix your double curtain, you will need to space your brackets apart so that the fabric doesn’t rub. Please see the below diagram under 'Clearances' of how to appropriately space your top fix brackets.
The process of installing a face fix double curtain is also very similar to installing single face fix curtains.
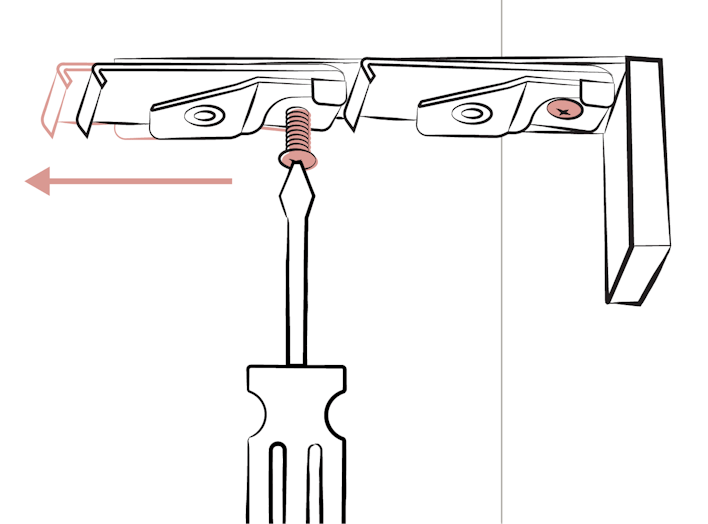
When installing face fix double curtains, you may find that the spacing of the brackets that the factory provides is not set exactly where you want it to be, and that your fabric may rub or be too far apart. This may depend on the heading combination that you chose. In this case, you can easily adjust the position of the brackets to bring the tracks/fabric closer together or further apart.
Firstly, install you tracks and fabric as per normal. If at this stage you aren't happy with the spacing, take a Phillips head screwdriver or drill, and slightly loosen the back screw of the bracket that you want to move. Depending on if you want the fabric closer together or further apart, slide the bracket along the fixing plate to your desired position. Once you are happy with where it is sitting, tighten the screw again to secure it.
There are different clearances needed depending on the combination of heading types you have chosen. Please refer to the below diagrams for the clearances needed for each heading combination.
![]()
We'd love to learn more about your project and provide any product + design advice.

Got questions? Our Help Centre has the answers! It's basically Curtains 101 and easy to follow guides.